
This week in the digital world we moved on to converting procedural textures to images that can then be edited in Photoshop and used to create materials like the following:

Gala Apple Skin

Gingham Picnic Blanket

Pitted Concrete

Polished Black Granite

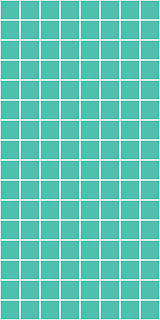
Bathroom Tile
Here is a breakdown of how these work out. In Maya, I created a simple Grid texture like the one below for the color of the tile:
 Once I had the dimensions figured out, I could export that to Photoshop and use it to create the bump map for the tile:
 Once I had the dimensions figured out, I could export that to Photoshop and use it to create the bump map for the tile:
 Then, with one more step, I could create the specular map.
 Using a combination of procedural textures and photographic images is mostly what is used in the industry today. Very few shaders are all procedural because it lends itself to looking computer-generated. To get a realistic render, it is always better to use parts of the real world in your work.
3 comments:
how'd you export the texture to photoshop. I've actually been trying to do this the past two days but can't figure it out. I was trying to export a grid to do a nasty bathroom scene, and couldn't figure it out to save my life. if you could clarify a bit on that one, i'd appreciate it. thanks!
This has been so long ago that I can't remember if this is the exact way that I did it in the past, but here is what I got to work in Maya 2012:
-Create a NURBS sphere, if you're just looking for a simple square texture to export. Maya does this based off of UV coordinates, so if you've already UV mapped your geometry, you can do it from that.
-Apply your shader to the geometry.
-Select the geometry, then shift-select the shader node in the Hypershade work area.
-In the Hypershade window select the command Edit>Convert to File Texture (Maya Software):Options . This will bring up the options box where you can specify the range of UV coordinates to use, the resolution of your output texture map, and your file format.
-Click on Convert and then Maya should create a duplicate of your original shader and should have replaced the procedural shader with a file that will be saved in your SourceImages directory of your project folder. You can then edit that in Photoshop to add your textural details.
Hope that helps out a bit. Here's a page that tells a little more about what the options of the Convert to File menu do: http://www.joelstutz.com/Texturing.html
awesome, thanks man! I saw the convert to file, but am getting down to the wire on my project. Thanks for your help!
Post a Comment