Motion control has become a mainstream tool in filmmaking today with smaller units that offer a great deal of flexibility and control:
7/25/10
History of Visual Effects - Motion Control
The use of motion control in filmmaking has been around for a long time. One of the first units, in fact, recorded onto a wax cylinder the movements of the camera and could then be played back. Computer operated motion control was first developed for the film Star Wars IV: A New Hope. This was the main technique used for the dynamic space flight scenes. By moving the camera around and past a static model, the effect was later achieved that the spacecraft seemed to be soaring past the camera. This home film from behind the scenes of Battlestar Galactica shows some of the ILM team at work in the original process:
ANIM 629 - Realistic Pumpkin
This week in the land of pumpkins...
 Our final assignment for this class is to create a realistic texture for a pumpkin that will then be composited into a photograph of other real pumpkins. Drawing on our previous experience with creating textures from photographs as well as using procedural textures, we created the maps for both the pumpkin and the stem.
 I couldn't find any photographic references that were good enough for being able to steal a lot of scarring details from and since pumpkins aren't in season, I had to paint in most of the scarring you see by hand. It was actually quite fun and I must admit that Photoshop has a lot of settings to help you get it right.
 Pumpkin Bump Map
 Pumpkin Specular Map
 The color map for the stem started off as a picture of tree bark. I then layered on some dark ribbing, some green color, and lots of tiny specks like you see on a real pumpkin stem.
 Stem bump map
 Stem specular map
Finally, I did a quick turntable rendering of the pumpkin so you can get the full effect of the texture.
7/17/10
History of Visual Effects - Stop Motion
The past week has focused on two influential men in the visual effects industry: Willis O'Brien and Ray Harryhausen.
Willis O'Brien from Wikipedia:
O'Brien was hired by the Edison Company to produce several short films with a prehistoric theme, most notably The Dinosaur and the Missing Link: A Prehistoric Tragedy (1915) and the nineteen minute long The Ghost of Slumber Mountain (1918), the later of which helping to secure his position on The Lost World. For his early, short films O'Brien created his own characters out of clay, although for much of his feature career he would employ Richard and Marcel Delgado to create much more detailed stop-motion models (based on O'Brien's designs) with rubber skin built up over complex, articulated metal armatures.
O'Brien's first Hollywood feature was The Lost World (1925). Although his 1931 film Creation was never completed, it led to his most famous work, animating the dinosaurs and the famous giant ape in King Kong (1933), and its sequel Son of Kong (1933). He was chief technician for the epic The Last Days of Pompeii (1935). The film Mighty Joe Young (1949), on which O'Brien is credited as Technical Creator, won an Academy Award for Best Visual Effects in 1950. Credit for the award went to the films producers, RKO Productions, but O'Brien was also awarded a statue. O'Brien's protege (and successor), Ray Harryhausen, worked alongside O'Brien on this film, and by some accounts Harryhausen did the majority of the animation. Rather than stop motion, he even did the real special effects on Orson Wells's American classic Citizen Kane.
Later movies with special effects by Willis O'Brien included The Animal World (US 1956, in collaboration with Harryhausen), The Black Scorpion (US 1957) and Behemoth, the Sea Monster (UK 1959, US release entitled The Giant Behemoth). Although O'Brien is widely hailed as an animation pioneer, in his later years he struggled to find work. On the 1960 remake of The Lost World, O'Brien was hired as the effects technician, but was disappointed that producer Irwin Allen opted for live lizards instead of stop-motion animation for the dinosaurs. One of his story ideas was used in Ishiro Honda's King Kong vs. Godzilla (1962). Shortly before his death, he animated a brief scene in It's a Mad, Mad, Mad, Mad World (1963), featuring some characters dangling from a fire escape. He died soon after that, leaving people disappointed about the passing.
The 1969 film The Valley of Gwangi, completed by Harryhausen seven years after O'Brien's death, was based on an idea he had spent years trying to bring to the screen. O'Brien's wrote the script for an earlier version of this story, a film released as The Beast of Hollow Mountain (US 1956) but O'Brien did not handle the effects.
Ray Harryhausen from Wikipedia:
Before the advent of computers for camera motion control and CGI, movies used a variety of approaches to achieve animated special effects. One approach was stop-motion animation which used realistic miniature models (more accurately called model animation), used for the first time in a feature film in The Lost World (1925), and most famously in King Kong (1933).
The work of pioneer model animator Willis O'Brien in King Kong inspired Harryhausen to work in this unique field, almost single-handedly keeping the technique alive for three decades. O'Brien's career floundered for most of his life—most of his cherished projects were never realized—but Harryhausen was the right person at the right time, and achieved considerable success.
Harryhausen draws a distinction between films that combine special effects animation with live action and films that are completely animated such as the films of Tim Burton, Nick Park, Henry Selick, Ivo Caprino, Ladislav Starevich and many others (including his own fairy tale shorts) which he sees as pure "puppet films", and which are more accurately (and traditionally) called "puppet animation".
In Harryhausen's films, model animated characters interact with, and are a part of, the live action world, with the idea that they will cease to call attention to themselves as "animation", which is different from the more obviously "cartoony" and stylized approach in movies like Chicken Run and The Nightmare Before Christmas, etc.
Springing from O'Brien's groundbreaking work, Harryhausen continued bringing stop-motion into the realm of live action movies, keeping alive and refining the techniques created by O'Brien that he had first developed as early as 1917. Harryhausen's last film was Clash of the Titans, produced in the early 1980s. Recently, he was involved in producing colorized DVD versions of three of his classic black and white films (20 Million Miles to Earth, Earth vs. the Flying Saucers, and It Came from Beneath the Sea) and a film from the producer of the original King Kong (She).
Both have had an indisputable impact on the animation industry and are memorialized today as pioneers of their art.
7/16/10
ANIM 629 - Converted Materials
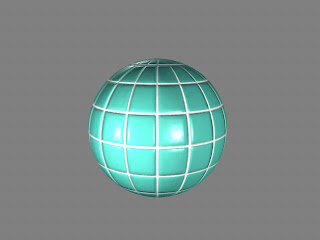
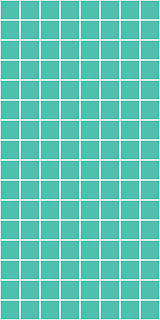
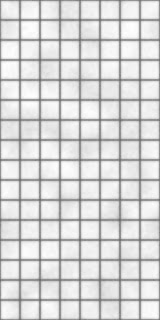
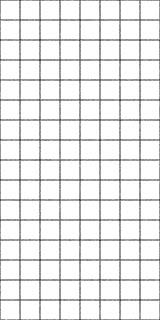
This week in the digital world we moved on to converting procedural textures to images that can then be edited in Photoshop and used to create materials like the following:
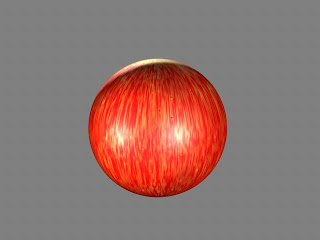
Gala Apple Skin
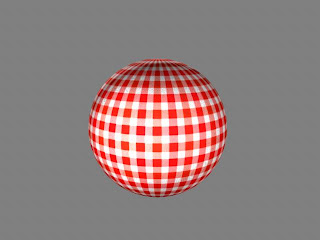
Gingham Picnic Blanket
7/13/10
ANIM 629 - Procedural Textures
What flavor of pumpkin is your favorite?
That's probably an odd question to ask, but that is one of the things we had to tackle this week in class. After having worked with photographic textures, this week we started working with procedural textures. Essentially, in any 3D program, you can add more than just bitmap images to each channel (i.e. color, bump, specular). Each program usually comes with a set of mathematical algorithms to achieve a certain 2D effect. For example, Maya has a noise node that can simulate random static. It is only random to a certain point, but it allows you a number of degrees of control that, when blended with other effects, can be quite convincing.

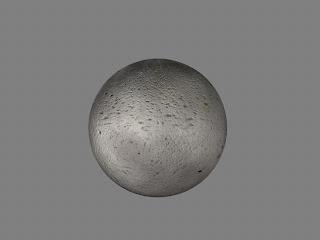
Take, for example, this orange peel pumpkin. This shader was generated using nothing but procedural textures. The color channel is a combination of an orange gradient with little brown specks laid on top while the bump channel was created using an inverted noise node.
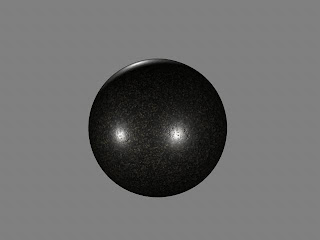
The simulated black leather here uses a fractal node to simulate the little cracks in the skin.
This pumpkin is supposed to be polished hammered copper. The one problem with this texture not looking real enough right now is that there isn't an environment reflected in the copper, just light sources.
Admit it, you licked you computer screen right now, hoping that this chocolate pumpkin was real, didn't you?
7/10/10
History of Visual Effects - Miniatures
The use of miniatures in film has been around for a significantly long time. Ever since the early days of film, model makers have been used to create stunning visual landscapes that are too large and expansive to be created at full size.
Filming miniatures also involves some tricky camera work as well. Usually, the models are filmed at high speed because any of the slightest movements in the model would ruin the illusion at regular speeds. By filming at a high speed, then playing the film back at a regular speed, the movement and motion of objects look more true to life.
Another consideration for filming miniatures is to have an accurate depth of field. In order to have the entire scene in focus, a very small aperture setting must be used on the camera. This allows the least amount of light to be exposed to the film at a time. In order to compensate for the reduced amount of light, extra lights must be used in filming.
You would think that a number of movies today use only CG for their work, but you'd be wrong. Some of the most successful movies today that use models for their shots are the Lord of the Rings films, the rocket in Apollo 13, the tumbler in Batman Begins and The Dark Knight, the latest remake of the James Bond film Casino Royale, and even the Star Wars prequel trilogy. It is often quicker and less costly to develop a physical model sometimes than to create it in the computer.
This Movie Magic television episode, although sixteen years old, showcases some films that have successfully used models for their films:
ANIM 629 - Bump and Specular Maps
 In order to add more depth and realism to a texture, there are two particular attributes that must be added to a texture: Bump map and specularity.
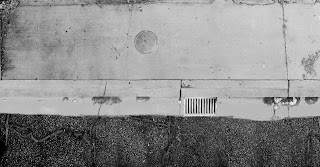
Bump mapping was developed as a way to simulate tiny changes in 3D geometry without having to actually model in those details. 3D programs use a grayscale image as data to tell exactly how to display these little details. In a bump map, 50% grey represents no change in surface texture. 100% white represents the most extreme extrusion of the surface while 100% black represents the most extreme indentation of the surface. On top of that, you can control the overall 'depth' of the bump map, although this can start to look really fake if you get it too deep. Here is the example of the bump map for the sidewalk part of the image:
Specularity is essentially a way of cheating the reflection of light on an object. All surfaces are reflective to some degree, but trying to simulate reflections in any 3D program is time-consuming. Instead, the program essentially lets you determine how sharp a highlight across a surface will be. For example, a really glossy surface would have a really sharp highlight, while a very rough surface would have the highlight spread far across it. In addition, you can control through your texture where parts will have a specular value and where they won't reflect any specular light at all. For example, in the following specular map for the sidewalk, you can see the areas that are white will show up with a highlight when the light strikes it at the right angle while those areas that are black won't show any specular light at all:
 The specular map for the wall. Notice that some elements are included here that aren't included in the bump map, namely the grime and graffiti.
I believe that this is it for this assignment. It was fun to go out and create textures, but I am ready to move on to something else. Stay tuned!
7/2/10
History of Visual Effects - Traveling Matte
One of the disadvantages of matte paintings that early filmmakers found was that the camera could not move, which often created very dull scene work. Visual effects artists began to experiment in techniques that would allow for a matte to be produced for every frame of film. One process involved filming a scene against a blue backdrop in high-contrast black and white film, then dying the negative in an orange dye. When the film is then processed using a blue filter that matched the backdrop, the result was a solid matte of the foreground elements. This was process was used extensively in the 1933 film King Kong:
Another process involved filming the foreground elements against a flat black backdrop, then producing a matte from that. This was the process used in the 1933 film The Invisible Man:
A process that was used extensively by Disney was the sodium vapor process which involved filming live action against a yellow backdrop. For example, this was used quite convincingly in the film Mary Poppins:

These processes all gave way to the more modern blue screening techniques of compositing. The rise of the optical printer also gave filmmakers the option of creating better effects from fewer generations of film. Mattes could then easily be drawn from the negative, allowing for better quality of effects. In addition, the use of the technique of rotoscoping (or hand-drawing mattes for film) gave additional options for filmmakers. These all, of course, laid the foundation for modern digital techniques in compositing:
History of Visual Effects - Matte Paintings
 One of the earliest techniques developed in visual effects was the idea of the matte painting. The above matte painting is from The Wizard of Oz and shows the view of the Emerald City. The idea for the matte painting originated by having an artist paint whatever fantastical scene they needed on a sheet of glass in front of a locked down camera, leaving the parts where live-action needs to be seen transparent. Because of the difficulties of having artists painting on location in changing weather and time conditions, this process was later replaced with having the live footage projected against a film screen, allowing the matte painter to work in the comfort of a studio to do their work.
Variations of this have existed in one form or another over the course of cinema history. However, today matte paintings are typically done digitally because of the ease of creation and also the ease of editing if the director doesn't like something. Here is an example of a modern matte painting by a student from the Vancouver Film School:
7/1/10
ANIM 629 - Color maps
The alleyway project continues now! This week I spent time creating the textures for the alleyway objects. Using the photos that I had taken, I combined a number of them into a suitable texture map that could then be mapped to the UV coordinates (read up on how ALFRED was UV mapped to get an idea of what that means). Essentially, I had to piece together about fifty different images to get the maps below, but they turned out really good, I think.


I did a quick rendering test after I got the textures all created to see how the color maps would look on the models. Not too shabby:
Subscribe to:
Posts (Atom)

