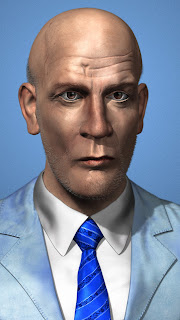
The above image was rendered out in passes in ZBrush and then composited in Photoshop with a few added filters and adjustments. You can export your image straight from ZBrush, but it helps the overall effect if you have some control on the individual elements that make up a rendering.
Because my class works in ZBrush 4R2 and I have both ZBrush 4 and 4R3, I mostly work in just 4 for the class work. ZBrush isn't backwards compatible, so there were a few tricks I had to pull to get it to work. I created the stubble and the eyelashes in Fibermesh in 4R3 and then exported them out as OBJ files to import into ZBrush 4. It works okay for this instance, but I would rather work just in 4R3 for the hair stuff.
Finally, the depth pass is more of an informational pass you can use in the Lens Blur filter in Photoshop to create a depth of field effect. The pass essentially starts at the foremost part of your model and assigns a color value from white to black as your model extends away from the camera. You can then use those values to tell the Lens Blur filter where you want to be in focus and how much the rest of the image is blurred.
Rendering in ZBrush isn't my favorite thing and I have to admit that I had a bunch of weird glitches with the program while trying to do so. Once the shadows and occlusion wouldn't render. Another time, they would only render black. Some times things break for no apparent reason in ZBrush, but we still use it because it's such a powerful program for 3D stuff.


No comments:
Post a Comment