I am a casual "hardcore" gamer. That means that I like immersive video games, but with family life, I don't get to play very often. (It's just as well, though. They can be big wastes of time.) In once sense, though, I find that a video game with a good, well thought out story can be just as stimulating and entertaining as a novel (I'm a Tom Clancy fan myself). However, there are plenty of games out there where you watch a set of scripted cutscenes and are expected to act out someone else's fantastical ideas with the false idea that, because you're holding a controller in your hand, you should be in control. These have often been overdone so much to the point where one can almost sense what is going to happen.
Game creators have gotten more creative with their story-based games, including parameters that allow you to choose the manner in which you will play the game that will affect the ultimate outcome (the Mass Effect and Deus Ex series being chiefly successful in my mind). However, there is one genre that I have increasingly been rooting for, mainly because it allows for a bit more creative thought in the process: the "Sandbox" style game.
I spent a lot of time as a child in the sandbox in the backyard, creating countless cities (most of which were destroyed with a cataclysmic flood, i.e. the garden hose). I think that's why I like the sandbox games. By definition, a sandbox game has no set story and no linear gameplay. Some might give you a goal to work towards, but none of them specifically require you to follow a story. Many of them allow you to follow your own creative whims, resulting in some interesting creations. Here are a few of my favorite ones that I have played and why I think they are valuable:
Sim City 4
Okay, so technically, Sim City is a "simulation" game, but the way I play it, it turns out to be a sandbox game. I have been playing the Sim City series since version one, back when I was in elementary school (I hear the latest incarnation is terrible, though). In it, you act as mayor in a city that you build for whatever purposes you would like. In my eyes, it can be a great teaching tool to show how complex civil management can be. I still can't seem to get my cities to maintain a balanced budget... which is why I cheat.
So for my game, one of the items I use to cheat is called the Money Tree. It's an object that charges you negative money, so it adds money to your account. Lots of it. So I use those funds to plan out a city, experimenting with the best methods of transit planning, zoning distribution, and city beautification. It turns the simulation into a sandbox, allowing me the freedom to do what my creative mind desires without the frustrations associated with the game. This one will always be in my back pocket, even though my favorite version came out ten years ago.
Garry's Mod
Originally created as a modification of the Source engine created for the Half Life series of video games, Garry's Mod has garnered a very strong following over the years. One of the things that caught my attention was the physics simulations that the game allowed you to dynamically create. It has allowed many people (granted, with too much time on their hands) to create fantastic mechanisms like the one you can see in the video above.
Scribblenauts
I first played this brand of game on my niece's Nintendo DS and I had an instant appreciation for it. In the game you play a character with a magic notebook. Whatever this character writes in the notebook will be manifested in real life. The game gives you various puzzles to solve, but leaves it open ended as to how you achieve the puzzle. For example, one of the first levels I played had a cat stuck in a tree with the goal being to get the cat down. Deciding not to try the obvious route, I decided to manifest a chainsaw and cut the tree down (with the cat in it, mind you... I'm not a cat person). The puzzle was solved and I got my reward. I was impressed by how many words were actually programmed into the game. Eventually, I just wanted to see how many things I could type before it got confused. I got to "narwhal" and gave up, because it kept manifesting everything I typed in.
Spore
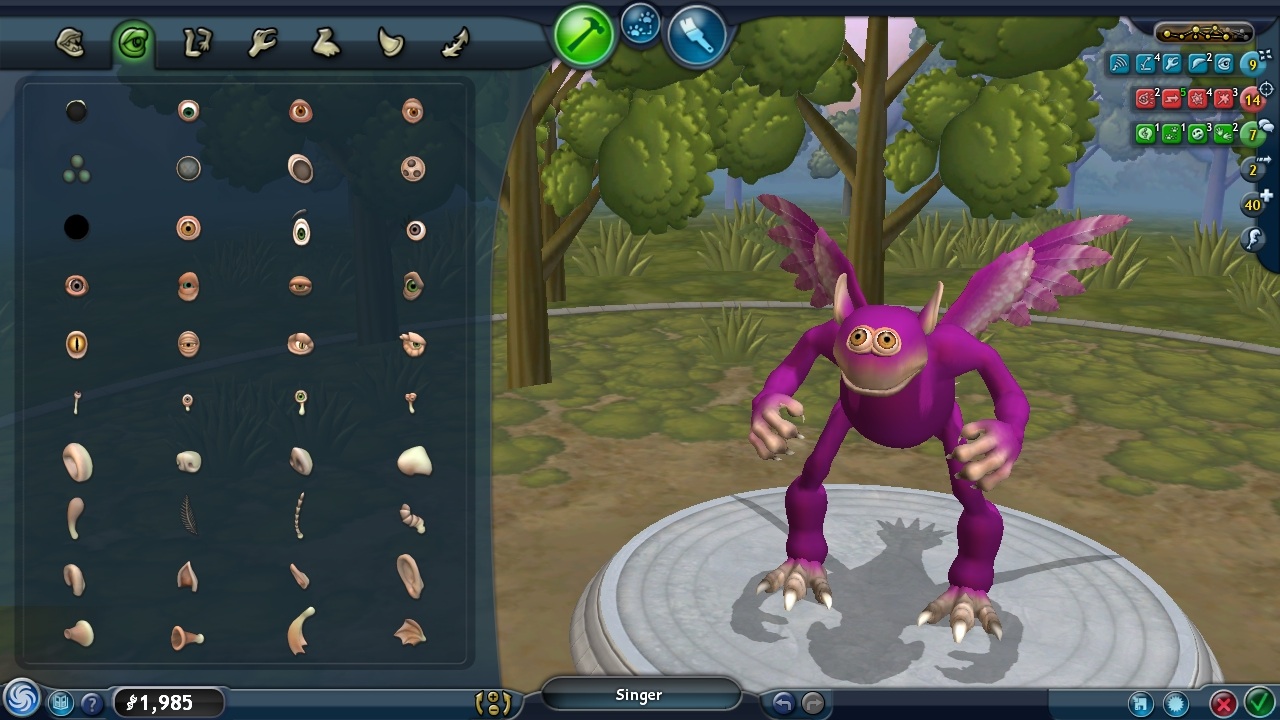
I'm actually just getting into this game for the first time, although it has been around for five years. The essence of the game is to guide your way from being a single-celled organism to being the dominant species on the planet. The gameplay isn't incredibly complicated and actually is a lot of fun. A few years ago, though, they released the "creature creator" portion of the game for free, which I was instantly impressed with. It allows you to mix and match body parts to create any type of creature that you wished. I think I have more fun designing the evolutionary upgrades to my creatures than I do actually doing the foraging.
Kerbal Space Program
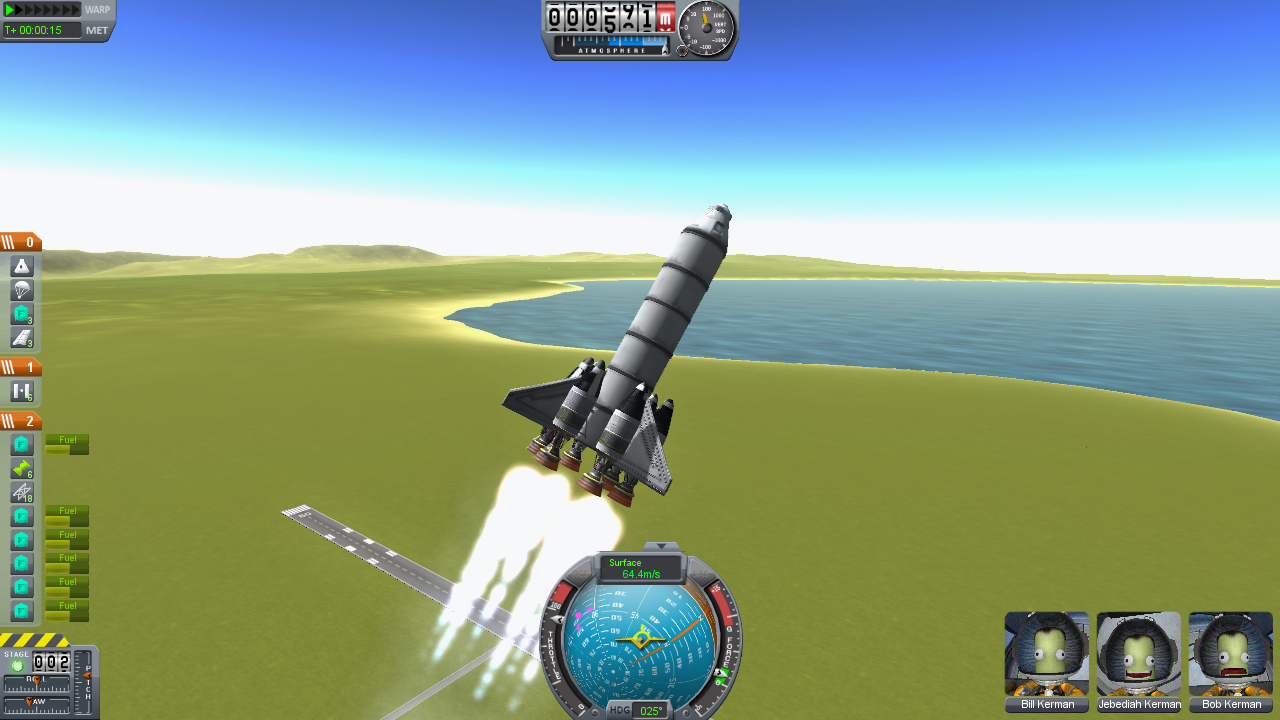
I discovered this game over the past year and instantly fell in love with it (probably due to my current job more than anything). In the game you are in charge of the space program of a race of small, green, aliens call Kerbals. Although the game is still in development, it can be incredibly addictive in its current incarnation. You design and build your own spacecraft like tinker toys with (hopefully) the right amount of parts to complete your mission. I have had many launch failures, but in doing so have learned the correct way to build and fly spacecraft.
Oddly enough, however, this game was better at teaching me orbital mechanics than almost a year of working at a NASA center. It has illustrated for me important spaceflight topics like specific impulse, Delta-V, spacecraft staging, and even proper spacecraft design. Not bad for a game that it technically still "beta."
Minecraft
Of course, this is probably the most successful grass-roots sandbox game ever developed. For those who haven't heard of it before, I can basically describe it as "digital legos." You can build any blocky creation that your mind desires, as seen in the image above.
This game actually has a survival mode as well, (you have to go around and collect resources and protect yourself from monsters) which I like playing with other people. My extended family all have this game as well as our own private server that we play on occasionally. By playing with other people, we can divide our labor and collect more resources. This allows for faster construction and overall safety for the group in the world. It is quite fun to see what you can achieve with other people at your side.
Overall, I think gaming companies could learn something from the more successful sandbox games out there. Nowadays it seems like the only thing being encouraged through mainstream games is more guns, faster cars, more zombies, more aliens, and more turning off your brain. We give babies toys to help stimulate their brain, but often forget that there are still ways of stimulating your brain and having fun while doing it. While I admit that there are plenty of people who waste their time on video games, I would still argue that they are a valuable medium for creative thought. People can waste time crafting, golfing, reading novels, watching reality television, running for political office, etc. Moderation in all things applies across the board, whatever your activity is. However, I believe that video games, like many other mediums, has the same power to instill imagination within individuals.
I normally don't post anything really food-related on this blog that isn't somehow used as an art project first, but I have been meaning to share this. A few years ago I was asked by a friend to cook the turkey for our upcoming Thanksgiving dinner. My first go-around turned out okay, but ever since then I have been searching for the recipe for a perfect turkey.
In recent years I started looking into the process of brining the turkey before cooking. However, brining in itself can be a messy process since it includes immersing a large, dead piece of poultry in a salty solution for a long period of time. An alternative solution I learned about was dry-brining, which gives the same benefits without the mess.
Over the past year I have been experimenting with dry-brining poultry and have come across a combination that seems to work fairly well. It leaves the turkey moist, tender, and with just the right amount of salt and herb taste to it. Here is my typical recipe that I follow for a 16 pound turkey:
I hope the turkey is thawed when you try this, otherwise you'll have a hard time. Typically you want to do your brining for three days. You can do this in two days in a pinch, but the longer it stays in, the better the effects. Three days before your dinner, lay the turkey out on a cookie sheet (or another type of container that will contain any spills). In a small bowl mix together 3 1/2 tablespoons of kosher salt and 1 tablespoon of thyme. You can remove the giblets and place them aside if you're going to be using them. Pat the turkey down with paper towels to remove any excess moisture. Rub the salt and thyme mixture on the outside and interior cavity, focusing on the breasts and thighs.
You will then need to place the salted turkey into the 2.5 gallon storage bag. (Place the giblets in as well if you are going to use them.) Place the turkey in the refrigerator, breast side up. Every 12 hours, massage the breast and thighs of the turkey through the bag, then alternate between breast side up and breast side down.
At least 8 hours before you need to start cooking the turkey, take it out of the bag and place it on a platter or cookie sheet in the fridge. Pat it down to remove any excess moisture.
One hour before cooking remove the turkey from the fridge and place at room temperature. Slice the onion and orange into quarters and set aside. Remove the butter from the fridge to soften up and slice into 1 tablespoon sized segments.
Preheat the oven to 500 degrees. Here's where things can get a bit tricky, but with a careful hand, you can make it work. Carefully separate the skin from the breast and thighs of the turkey, taking care not to tear the skin. Place the pads of butter under the skin and inside the inner cavity. Season beneath the skin with salt, pepper, rosemary, and bay leaves. Stuff quartered onion and orange into inner cavity.
Place turkey in a roasting pan on top of a roasting rack (I find that if I don't elevate it from the bottom of the pan, it tends to fall apart while cooking... not ideal)When cooking your turkey, follow the standard guidelines for cooking length. I typically cook mine at 500 degrees for the first 30 minutes, then reduce the temperature to 325 for the remainder of the cooking time. If the skin around the breast starts to look too brown the last hour, I place a light foil tent over it to shield it from the direct heat.
Once your turkey is done cooking, remove it from the oven and let it sit for 30 minutes lightly tented in aluminum foil. After that, have at it! I hope it turns out good. This method hasn't ever let me down for creating moist, tender, savory turkey that all can enjoy.
One thing to note is that because of the salt-brining, the drippings might be too salty to be used in any gravy. That is one drawback to this method, but you can always find alternative methods to cook gravy.
I have to admit that having two children under the age of 2 sort of drains my desire to do fanciful holiday crafts. However, I've set the bar too high for myself, I suppose. Anyway, this year I decided to do a rendition of Robert Downey Jr. ala Iron Man 3. I recently got to see the movie for the first time (the reason: two kids under the age of 2) and really enjoyed it. Actually, I really like all the Iron Man films, so I think this is a fitting tribute.
The time waster
The time waste-ee
I had to put in a shot of my daughter's pumpkin
Click here for my comprehensive guide on how to do one of these. I think next year I might try carving one of these out with a rotary tool. No joke. I would love to know how to make these go faster.
Even though NASA might be shutdown, that doesn't mean that I have to stop working (yet... but that's another story). In the mean time, I am at home doing some work. I finally got the chance to take the Mark 3 suit into ZBrush to do some fine detailing:
After I got to putting back in the seams and wrinkles that didn't show up from the laser scan, I went back and created some grunge maps with added dirt and yellowing of the material. I even programmed in some controls for the rig so you could determine the level of dirt and weathering of the suit to fit whatever needs you had.
Now to test it out in an animation. The rigging on this uses Modo's full body IK system, which doesn't always work out for the best.
Let's hope this shutdown doesn't last too much longer.
So for the past few months I have been working hard with the concept analysis team here at NASA JSC, helping them visualize the recently announced asteroid redirect and utilization mission. It has been quite the brain-opening experience, learning about all that goes into planning a mission of this caliber.
One of the main things that we have been hard at work at here is an animation representing the manned portion of the mission, which is what the JSC team has been focusing on. This animation was presented at a mission formulation review up at NASA headquarters:
It was very well received, which was good news for us. We spent a lot of time this go-around making things look realistic and getting everything we could technically accurate. (We had gotten a lot operationally wrong the first time we did an animation of this mission).
If you're wondering what I personally did in the video, it was pretty much the part from when the two spaceships dock to when they separate. All of the modeling and animation was done in Modo while we did the compositing. To save render time on some of the less complicated vehicle shots, we wound up using Video CoPilot's Element 3D plugin for After Effects. It took a lot to set up, especially since it doesn't cast shadows, but we wound up getting it in the end. We also got to do our own J.J. Abrams-style lens flares for it, which was a nice touch in the end. We used SonicFire Pro for mixing together the music, which helped out a bunch in the long haul. It's a handy piece of software that anyone who regularly does videos needs to pick up.
Overall, I am pleased with the results. It's a good blend of artistic interpretation with real engineering planning behind it. Here are a few more still images that I created that were used in the review:
Here's another peek into my work. We recently got connected to the group here at NASA JSC who are working on the Mark 3 surface suit. We showed them a few things that we could do and they were interested in how that could apply to their work.
As a bit of a test run, they gave us a 3D laser-scan of the Mark 3 surface suit. We quickly did a quick texturing and rendering of the raw file, which was well into the millions of polygons.
I am in the process of creating a low-resolution version of the suit, after which I'll project all the details of the high-resolution into a normal map. It should be a good asset to have, once I finish it. It certainly will be hard to create a usable rig for the legs, though, looking at the joints in the hips. I'm still scratching my head about how to tackle that one.
I have been meaning to do a lunar surface ZBrush sculpt for work, and I finally got some time to work at home today. This was knocked out in about three hours. If I was doing it right, I would have split up the UV map into four or more tiles, but as it currently sits, the final texture maps were around 8192x8192 pixels.
I haven't had much free time lately to do 3D stuff on my own at home, but I really wanted to try out a new feature in ZBrush. The latest release included a tool they have been developing called "ZRemesher." It essentially uses complex algorithms to analyze the surfaces of your sculpts to create a base mesh that works with the curves. With the addition of this tool, it makes sculpting that much easier.
I did the above old man in about two hours in ZBrush. It started off as a Dynamesh sphere where I got it to the proper size. After that, I drew some curves on the surface to suggest how the polygon flow should be generated, then let ZRemesher do its magic. I can't complain:
This truly solidifies ZBrush in my mind as a great development tool. It's great to worry about technical details later and just focus on the creative at first.
Something I finally worked on at my job here with NASA got announced to the public, so I can finally talk about it.
For the past three months, I have been working with a team here that is putting together the manned space flight portion of a mission to capture and study an asteroid. We have been instrumental in helping the team both visualize and communicate their ideas to the rest of the NASA centers. It is interesting to see how different concepts come together and how different ideas start to form actual missions.
There are a number of inaccuracies with this video, partially due to time constraints, and partially due to us having to fill a hole we see in the animation. (You should see the stuff we had to cut out!) However, the idea is there about what NASA has been charged to do. Now we get to see if Congress approves the budget suggestion given by the administration.
All in all, this has been a very rewarding project and a lot of fun. When I have more time, I'll go into more depth on what I did specifically that helped speed along the process. In short, any shot you see that has a crewman or spacesuit in it is one that I either animated or did some compositing work on.
I had a "free" weekend and decided to spend part of it doing some sculpting in ZBrush. I have been fascinated with this particular alien head shape and decided to do a little bust sculpting. The tools in the latest version of ZBrush have been particularly useful in helping the artist with getting the topology to work for them. Dynamesh along with qRemesher were both helpful in making sure that the topology didn't get too squirrely.
Since I haven't been too impressed with ZBrush's rendering capabilities, I used the Decimation Master plugin to export a lower-res version of the bust out. Shading, lighting, and rendering were all done in Cinema 4D with some post-processing done in Photoshop. All in all, this was a fun little practice session.
I was only nine years old when my brother brought the game Myst into our house. I remember vividly delving into it's surreal world and being mesmerized by the groundbreaking visuals that it held. It was at that moment that a seed of fascination had been planted inside me which continued to grow and grow and grow.
It has been many years since that day when I was introduced to the world of 3D computer animation, but I have had an increasingly strong desire to learn more and more about it. I remember the first computer animation I created as a teenager using Strata Studio Pro: a simple car driving around a corner and into a garage with the door closing behind it. The modeling was crude, there were no textures, the animation itself did not look realistic at all, the resulting movie took up a significant portion of our hard drive space, and the rendering time tied up the family computer for over a day. Despite all those things, I realized that there was something in my future involving this new developing medium.
My interest in 3D computer animation grew exponentially over the years and I have never been able to get enough of it. I am continually fascinated by the challenging visuals that are continually being achieved in the entertainment industry. I'm the type of person who will buy the special edition of the movie just so I can see all of the "Making Of" featurettes. I think I enjoy them more than the movie sometimes. Although I had this strong interest in 3D computer animation, I chose to do my undergraduate work in industrial design. I have no regrets about my decision to pursue that path, however, because I learned a great deal about proper proportions, composition, form, color theory, and how people's perception of things can be influenced by visual cues. I recognize that many of these principles translate very easily into visual entertainment.
I graduated from Brigham Young University in 2007 and was hired by Pride Mobility Products in Scranton, Pennsylvania. While there I was responsible for designing various mobility products such as powered wheelchairs, scooters, and other accessories. Oddly enough, however, I found my duties in the design team being focused more towards tasks that were closely related to what a technical director or render wrangler would do. I was often chosen to do the renderings for the products we designed because I understood how to program shaders and how to create HDR studio lighting setups. In addition, during our regular meetings, I found myself doodling little cartoon characters that I had dreamed up or dreaming up ways of how our products could transform into robots, etc. Eventually the itch returned and I realized that my ultimate goals and professional desired wouldn't be fully satisfied in my current career path.
In the spring of 2009 I decided that I wanted to pursue 3D computer modeling and animation as a profession and applied for the MFA program at Academy of Art University. I recently moved to Provo, Utah, and am currently taking classes online while I pursue some other personal goals. I am eager to collaborate on projects and am excited to get involved with the other graduate students. Feel free to check out my web site www.rfxdesign.com and give me any critiques on my work. I'm always looking for a chance to improve my knowledge and skills.